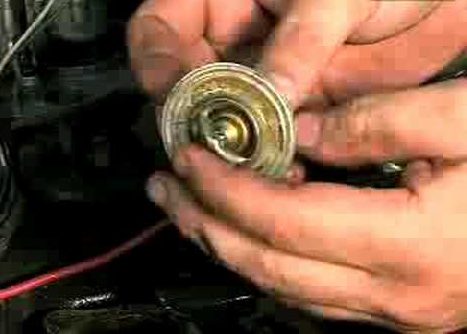
The functions of a car’s thermostat cannot be over-emphasized. It plays a huge role in maintaining the proper operating temperature of your engine. When the thermostat fails, it can lead to different problems such as overheating or poor engine performance. A replacement should be done immediately.
However, after replacing the thermostat, it is important to take a series of steps to ensure that everything is functioning as it should. Below are “what to do after replacing the thermostat in your car”.
After replacing the thermostat in your car, you should inspect the car for leaks, top up the coolant to the appropriate level, bleed the system if necessary, reconnect the battery, start the engine, and let the car idle while you monitor the temperature. You should also test drive the car in different driveable conditions.
What to Do After Replacing Thermostat in Your Car
Here are what to do after replacing the thermostat in your car:
1. Inspect Your Car for Leaks
After changing a car thermostat, before starting the car, inspect the area around the thermostat housing, the radiator, and any connections for any signs of coolant leaks. If you notice any leaks, tighten the connections or replace any damaged hoses immediately.
You don’t want to leave the cooling system leaking to avoid loss of coolant and potentially cause overheating.
2. Top Up Coolant
You should top up the coolant in the car. Ensure that the coolant level in your radiator is topped off to the appropriate level. The coolant should be a 50/50 mixture of antifreeze and water unless your vehicle specifies otherwise.
You should also check the coolant level in the overflow reservoir and add more coolant if needed. Ensuring to use the correct type of coolant is important to avoid stories that touch.
3. Bleed the System (If Necessary)
Some vehicles may require you to bleed the cooling system to remove air pockets that can cause overheating or other issues.
If you don’t know whether your car is among those needed, you can check the car manual to see if your vehicle requires this procedure and follow the provided instructions.
Bleeding the system involves opening a bleed valve or allowing the engine to run with the radiator cap off for a short time.
4. Reconnect the Battery
If you disconnected the battery during the thermostat replacement, now is the time to reconnect it to allow you to start the car and monitor the temperature.
5. Start the Engine
Start the engine and let it idle. Keep an eye on the temperature gauge on your dashboard. The thermostat should open and close as needed to maintain the engine’s temperature within the normal operating range.
If you notice any unusual temperature fluctuations, it may indicate a problem with the thermostat or the cooling system. You may need to check your replacement to be sure it is properly done.
6. Check for Proper Operation of the Car
While the engine is running, pay attention to any unusual noises or leaks. Ensure that your heater is working correctly as well. A malfunctioning thermostat can impact your vehicle’s ability to provide heat in the cabin.
7. Test Drive the Car
Take your car for a test drive, preferably in a variety of driving conditions, such as city traffic and highway driving. This will help ensure that the thermostat is functioning correctly under different loads and speeds. Keep an eye on the temperature gauge during the drive to confirm that it remains within the normal range.
8. Monitor the Temperature
After the thermostat replacement, continue to monitor the temperature gauge for several days to make sure that the engine isn’t overheating.
Furthermore, ensure to check for any coolant leaks or unusual engine behavior. If you notice any issues, address them promptly to prevent potential damage to your vehicle.
9. Top Up Coolant Again
A few days after the thermostat replacement, recheck the coolant level in the overflow reservoir and top it up as needed.
Sometimes, air bubbles can escape from the system, causing a temporary drop in the coolant level. Maintaining the correct coolant level is crucial for the cooling system’s efficiency.
10. Dispose of the Old Thermostat
You can now dispose of the old thermostat by following your local regulations for recycling or disposing of automotive parts. Many auto parts stores offer recycling services for old vehicle components.
Do You Need to Bleed Coolant After Replacing Thermostat?
Yes, you need to bleed the coolant after replacing the thermostat to enable the cooling system to work very well.
Even though bleeding of coolant after replacing the new thermostat depends on the specific make and model of your car and the procedures you followed during the thermostat replacement, bleeding the thermostat will ensure the proper function of your vehicle’s cooling system.
This is because the presence of air pockets in the cooling system can lead to overheating and other engine-related issues, so it’s important to understand the signs that may necessitate bleeding and follow the proper procedure to have it done.
Furthermore, if you drained the entire coolant system during the thermostat replacement, it’s highly recommended to bleed the system afterward. Draining the coolant completely will introduce air into the system, necessitating the bleeding process.
If after replacing the thermostat you notice symptoms like erratic temperature gauge readings, overheating, or a lack of heat from the vehicle’s interior vents, it’s a strong indicator that air may be trapped in the cooling system. In such cases, bleeding the coolant system is crucial to resolve these issues.
Conclusion
It is not all about replacing the thermostat, you should also know what to do after the replacement is done. There are some procedures to follow and those procedures have been explained in this article. All you have to do is follow them judiciously to keep your car running smoothly.
Replacing the thermostat in your car is a maintenance task that can help ensure the proper functioning of your vehicle’s cooling system. It is important to follow these post-replacement steps to guarantee that your engine stays within its ideal temperature range, preventing overheating and potential engine damage.

