A seat belt buckle cover is a thoughtful safety measure put in place by manufacturers, a seat belt buckle on its own is good but the cover is an added advantage.
Having a seat belt buckle cover in a car will mean you are taking extra safety precautions. In the course of the use of the buckle cover, there may be a need to open it.
This may be due to obstructions such as; particles, and paper pieces that get stuck inside the buckle and prevents it from working properly.
Can you Open a Seat Belt Buckle Cover?
There may be a need to open the seatbelt buckle cover for your car probably due to an obstruction, it getting stuck and preventing the device from working as it should.
Opening a seat belt buckle cover is something that can be done at home if you have the necessary tools; a pointy object and a set of screwdrivers plus the know-how. If you will need a visual illustration, check out some videos on YouTube.
How to Open Seat Belt Buckle Cover
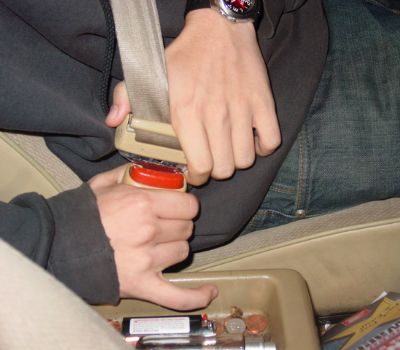
The first thing to do will be to access the seat belt buckle, then;
1. Check the Tongue of the Seat Belt for Any Irregularities
The tongue of the seat belt known as the ‘male’ usually silver shaped that connects with the buckle may have some irregularities that cause it to lock incorrectly.
In order to open the seat belt buckle cover, you will have to check that nothing is wrong with the tongue. If the tongue is distorted, you may need to change it
2. Wiggle a Pointed Object in the Buckle
The pointed object could be a small knife or anything pointy that can have the job done. The purpose of this is to remove anything that may be stuck within the buckle such as; crumbs, paper pieces, etc.
3. Remove the Buckle’s Female Portion
The female portion is attached to the seat’s side, to do this you may have to remove the front seat in order to access the nut and bolts that are keeping the buckle in position. Simply using a rachet will suffice in removing the nut and bolt.
3. Wiggle a Pointy Object Inside the Buckle
This should be done if you are sure something is preventing the device from working well. Using a small knife, pin, etc. will do the job.
4. If the Obstruction Won’t Come out, Open the Buckle
You may have to pry open the buckle if the foreign item causing the obstruction refuses to come out. Opening the buckle should be done with care so other parts don’t come off with it.
5. Test the buckle, After Removing the Obstruction
After you must have removed the obstruction, test to be sure the belt mechanism is working correctly by pressing the red button. For ease of movement, you can spray lubricants on the springs.
6. Put the Seat Belt Buckle in Order
You will have the re-assemble the seat belt buckle the way it was before you remove it and ensure that it is done correctly.
Nonetheless, you should ensure that your seatbelt is working very well and in use anytime you hit the road to avoid being pulled over by the police and getting a seatbelt ticket.
How to Fix a Broken Seat Belt Buckle
Seat belt buckles may get broken over time and will need to be fixed. Fixing a broken seat belt buckle is something that can be done at home with the right tools and most importantly the know-how.
Before we proceed, you have to know that the very first step will be to get the needed tools ready such as; a pointy object (preferably a butter knife) and a set of screwdrivers.
Step 1: Check Out the Belt with Care
You will need to first check the belt for signs of damage whether there’s a cut somewhere or dirt particles stuck in it. This is to rule out the possibility of a cut being the cause of its failure. The same should be done to the tongue of the seat belt.
Step 2: Examine the Buckle
The buckle should also be examined to see if anything is stuck inside. If there’s any obstruction the butter knife will come in handy.
Here, put the tip of the knife inside the buckle and move it around gently. Doing this may be sufficient to make the seat belt work.
Step 3: Remove the Buckle
You may have to remove the buckle if the first two steps didn’t fix the problem. The screwdriver can be used here to remove the buckle whether it’s fitted or screwed with the car seat.
Step 4: Put the Buckle Parts Separately
In order to determine the real problem, you will have to disassemble the buckle, this will be done by unscrewing the buckle socket or gently opening for buckles without a socket. You need to be careful when doing this.
Step 5: Inspect the System Attached Inside
The system has three components; the spring, the cam, and a red button. Inspect each of these components and test to see if they function well. If it isn’t, you may have to replace any broken parts and clean the old components.
Doing this should be enough to fix the problem but if it isn’t then you should follow the next step.
Step 6: Put the Buckle Parts Together
You will have to reassemble the buckle and put it back together. While doing this you may need to clean the crevices between the seats. If any of the steps didn’t work then you will have to get a new one.
Uses of a Seat Belt Buckle Cover
Seat belt buckle covers are used so there will be no need to undo a seat belt. It is also a safety measure for when children are in the car, children can decide to play around by trying to unbuckle the seat belt. A seat belt buckle cover prevents this from happening.
It is also useful because it ensures seatbelts used by persons with behavioral problems remain fastened. Don’t forget to always clean your seat belt to avoid staining your dress.
Conclusion
If opening the seat belt buckle cover did not fix the problem, then you should get a replacement for the cover. Also, if you don’t understand the procedures explained in this article, we suggest you take your car to a repair shop and have people that work on car seats fix the issue for you.