Ball joints are car components that connect various parts of a vehicle’s suspension allowing for movement and flexibility while maintaining stability. It is an important part of a vehicle that should not be overlooked because it’s not meant to last forever.
Over time, ball joints can wear out, leading to issues such as poor handling, alignment problems, and excessive tire wear. When this happens, a replacement is needed.
Replacing a damaged ball joint is made easier with a ball joint press. The press is a tool used for the removal and installation of ball joints in vehicle suspension systems. It is designed to make the removal and installation of ball joints more manageable, especially in situations where significant force is required.
Therefore, using a ball joint press involves setting up the press, aligning the components correctly, and then applying force to either remove the old ball joint or install a new one.
Tools and Materials Needed
Here are the right tools and materials needed for a ball joint replacement using the press:
- Ball Joint Press Kit: Ensure you have a quality press kit, including a C-frame or press frame, threaded rod or screw, receiver tubes or adapters, and press plates or cups.
- Socket and Wrench Set: Choose the appropriate size socket and wrenches to remove nuts and bolts securing the ball joint.
- Jack and Jack Stands: Use a jack to lift the vehicle and secure it in place with jack stands.
- Safety Glasses: Protect your eyes with safety glasses during the entire process.
- Penetrating Oil or Rust Penetrant: Apply this to loosen any rust or corrosion around the ball joint.
- Hammer: A hammer may be needed to tap components gently and aid in the removal process.
How to Use a Ball Joint Press
Here’s a general guide on how to use a ball joint press:
Step 1: Lift and Secure the Vehicle
Use a jack to lift the vehicle off the ground, ensuring it is high enough for easy access to the suspension components. Place jack stands under the vehicle and lower them onto the stands for added safety.
Once this is done, you can go ahead to identify the ball joint that needs replacement and inspect it for any visible damage or signs of wear.
Step 2: Remove the Old Ball Joint Using the Press
The start off with removing the old ball joint, you need to spray penetrating oil or rust penetrant on the ball joint and any surrounding components to facilitate easier removal. Locate and remove any retaining clips or nuts that secure the ball joint to the control arm or steering knuckle.
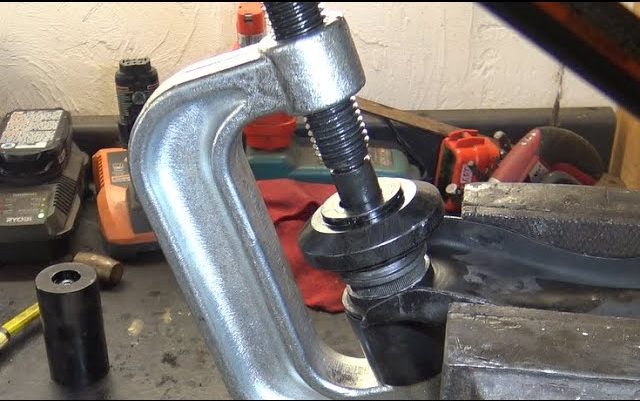
- Now, place the press over the ball joint, ensuring that the C-frame or press frame is properly aligned.
- Choose the appropriate-sized receiver tubes or adapters to fit over the ball joint and support the control arm or steering knuckle.
- Place press plates or cups on either side of the ball joint to distribute pressure evenly.
- Use a wrench to tighten the press, applying pressure to separate the ball joint from the control arm or steering knuckle.
- Monitor the alignment to avoid damage during the pressing process.
Step 3: Instal the New Ball Joint Using the Press
- Place the new ball joint in position, ensuring it aligns correctly with the mounting holes.
- Position the press in a reverse manner, with the C-frame or press frame supporting the control arm or steering knuckle.
- Use the appropriate-sized receiver tubes or adapters to press the new ball joint into place.
- Verify that the new ball joint is seated properly and securely in the mounting hole.
- Secure the new ball joint in place by reattaching any retaining clips or nuts. Follow the manufacturer’s torque specifications for tightening.
If any other components were removed to access the ball joint, reassemble them and carefully lower the vehicle using the jack. After the vehicle is lowered, remove the jack stands.
Take the vehicle for a test drive to ensure that the new ball joint is functioning correctly, paying attention to handling, steering responsiveness, and any unusual noises.
Pros of Using a Ball Joint Press
The pros are:
- It Provides Precision and Control: A joint press provides precise control over the application of force during the removal and installation process. This precision is crucial to avoid damage to the ball joint or surrounding components.
- It Minimizes Damage: The design of the press minimizes the risk of damaging the ball joint or other suspension components. It evenly distributes pressure, reducing the likelihood of distortion or breakage during the pressing operation.
- It Ensures Versatility: The press kits often come with a variety of adapters and press plates, making the tool versatile and compatible with different ball joint sizes and vehicle models. This versatility allows for a wide range of applications in various automotive repair scenarios.
- It is Efficiency and Time Savings: Using the press is generally more efficient than alternative methods, such as using a hammer and pickle fork. The threaded rod or screw mechanism allows for controlled and gradual pressure application, leading to quicker and more effective ball joint removal and installation.
- It Reduces Physical Strain: The mechanical advantage provided by the press reduces the physical effort required to remove and install ball joints. This can be particularly beneficial in situations where manual force alone might not be sufficient.
- It Enhances Safe Operation: When used correctly, the press enhances safety by providing a stable and controlled environment for the pressing operation. Safety features such as press plates and receiver tubes contribute to preventing accidents or injuries during the process.
Conclusion
Mastering the use of the press is a valuable skill any automotive mechanic will know because it makes the replacement of a ball joint easier. With the right tools, safety precautions, and a methodical approach, replacing ball joints with the press becomes a manageable task. It also helps to prevent damage to the ball joint or surrounding components during the replacement process to make the job more efficient.